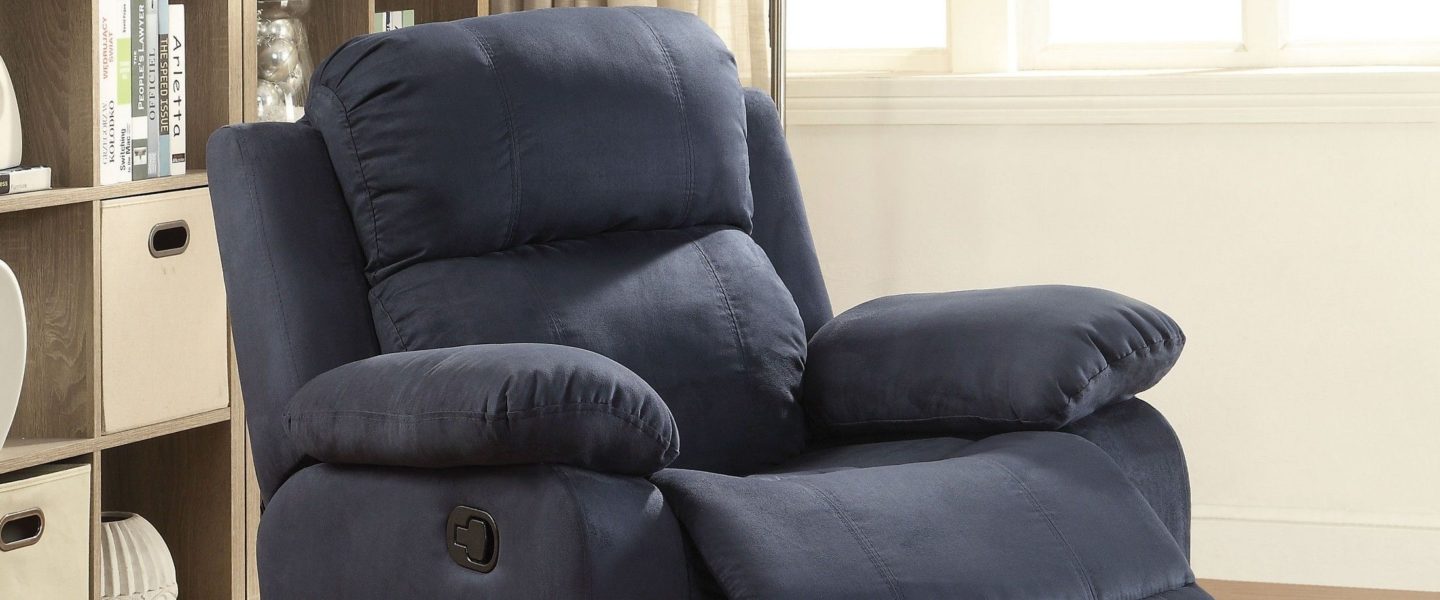
So, the existing upholstery of your recliner has worn out as your furry friend has scratched his paws on it? Well, no matter what the reason is, reupholstering the recliner is the only solution.
It is quite common that the upholstery of a recliner wears out with time, especially leather, as it has a limited lifespan. When changing the entire recliner isn’t an option, changing its upholstery can be the best thing to do.
But how to do it? Now there is no need to send your favorite chair to the nearest furniture shop when you can do it at home!
Here are eight simple steps on how to reupholster a recliner quickly.
Things you need:
Before we take you through the steps to change the upholstery of the recliner, it would be great to gather items beforehand. Keeping all the items in place will save you a lot of time, while you can do it without any hassles.
Here’s what you need:
- Cloth measuring tape
- Masking tape
- Tack remover
- Utility knife
- Tailor’s chalk
- Screwdriver
- Upholstery needles
- Scissors
- Glue sticks
- Needle and thread
- Wax coated thread
- Covered button kit
- Pliers
- Staple gun and staples
- Fabric glue
- Square drill
- New fabric: leather or fabric
- Sewing machine
Upholstering the recliner can be a time-taking taking depending on its size and how much time you put into it. However, it is really worth it to invest your time to give a new life to the recliner.
Steps to Reupholster a Recliner
1. Start with Measuring the Fabric
To begin with, you should start by measuring the fabric required to upholster the recliner. Use the measuring tape to measure the dimensions. Note down all the dimensions on a paper so that you can use it during the process.
Always keep an extra margin of 1 or ½ inch so that you can tuck the fabric properly. While measuring the couch, remove the seats and headrests so that you can measure everything properly. Also, measure the seat before and after recline so that fabric doesn’t stretch too much after reclining.
2. Disassemble the Recliner
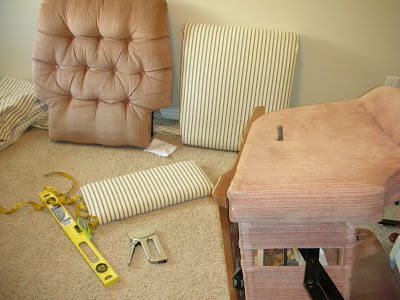
Now it’s the time to disassemble the chair so that you can take off the existing upholstery. Unscrew all the screws using a screwdriver to disassemble it fully. While removing the parts, take pictures so that you don’t find it daunting to put the recliner back into its original shape.
Also, label all the parts, and keep going with the flow. Using a power drill will save a lot of time, and you can disassemble the chair quickly to prepare it for the next step.
3. Remove the Old Fabric
Here comes a cathartic step that you will certainly love to do, and that’s removing the existing fabric. Use high-quality scissors, and cut off the fabric to remove it easily. Furthermore, you can also use a utility knife to puncture the fabric so that you can remove it without damaging the cushioning.
It is advisable to take pictures while removing the fabric, as it will be convenient for you to put the new fabric. While removing the fabric, take care of the padding and foam. Don’t remove the foam, and it will impact the cushioning and comfort of the recliner.
4. Clean it Thoroughly
Clean the recliner thoroughly using a vacuum cleaner to get rid of the dust and dirt. Moreover, clean the entire frame, and make sure that there is nothing that can damage the new fabric. To clean the wooden frame, you can use a brush as a vacuum cleaner doesn’t work well on it.
5. Cut the Fabric

Cut the fabric using tailor scissors. Use all the measurements that you have noted down on the page. While cutting the fabric, label the pieces using tailor’s chalk so that you can quickly put them in the right place.
6. Apply the Glue
Apply glue on the fabric pieces that you have cut. After applying the glue, place the vinyl on the floor so that the glue gets a bit dry and stable. Now put the pieces on the respective parts and rub them gently so that the fabric sticks to the recliner properly.
Gluing is an essential process that requires thorough care. Always use the best-quality glue that is ideal for use with leather and fabric. Also, it should not damage the frame of the recliner.
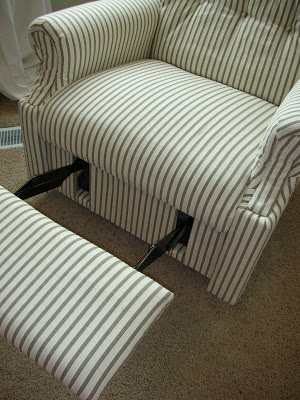
7. Sew the Fabric
After applying the glued pieces on the recliner, sew the pieces together. The main parts that require sewing are seats, footrest, headrest, and much more. Use a thread that matches the color of the fabric so that it doesn’t look odd.
If you don’t know how to use a sewing machine, then consider using a needle and thread. Also, you can call someone in your friends to help you out so that the re-upholstering process becomes fun and easy.
8. Staple the Fabric Properly
Staple the fabric with the recliner using a staple gun. The staples will hold the fabric tightly with the recliner while helping the glue get a good hold. When applying the staples, make sure that they aren’t visible so that the recliner looks good.
Furthermore, keep a glue gun handy to reapply the glue wherever required.
9. Put the Recliner Parts Back
Now reassemble the chair by using the photographs. Use a screwdriver or a square drill to screw the bolts back in place. Ensure that the screws are tight and test the recliner before using it.
Once done, scrutinize the recliner thoroughly, and you are good to go.
Takeaway!
With this easy eight-step process, you can reupholster your recliner. If buying a new recliner isn’t a viable option, then this process is what you need.
Always use the best quality products such as glue, fabric, and much more so that the recliner looks great. Furthermore, take pictures at every step, so you can use them for reference in case you find it hard to reassemble the couch.